Swerve
This guide was written to help 1699 get started with swerve. If that's you, welcome!
Background
In 2023, Aces High ran using four MK4i swerve modules on our robot. When doing my original research, I figured I would base my code off of 1678's 2022 code. As soon as it was released, I switched to using 254's swerve code. This was primarily because the wrap-around/shortest path logic wasn't working as expected and there was an issue I was seeing where a module was getting "stuck" or otherwise not aligned which was dragging on the carpet.
Important callouts
Our modules were set up using Falcons and CTRE's absolute mag encoder. Your experience shouldn't be too different using NEOs and ThriftyBot's encoder.
Getting up and going
Conventions
If you're not already familiar, take a look at the pose geometry classes. I have them documented on the Pose Key page but they are also now built into WPILib. In particular, these classes are CCW positive, meaning rotating in a "positive" direction means rotating counter-clockwise.
Whenever programming robots, I always encourage that positive motor demands always result in the axis moving "forward" (whatever you defined that as, as long as it's consistent throughout the robot) and a positive change in sensor feedback. For example, if you apply a positive value to a drive motor, that motor should be driving the robot "forward". In the case of a flywheel, it would be shooting a ball "out" of the robot.
Be careful with units. The odometry classes typically store values in meters.
Getting started with 1678's 2022 method of using swerve
I'm going to walk you through getting started using 1678's method of using swerve. This is primarily because it allows me to directly reference code.
I highly recommend putting your robot on blocks so that the modules can move freely.
Similar code:
- SwerveModule is from SwerveModule
- This SwerveDriveKinematics section is from their constants
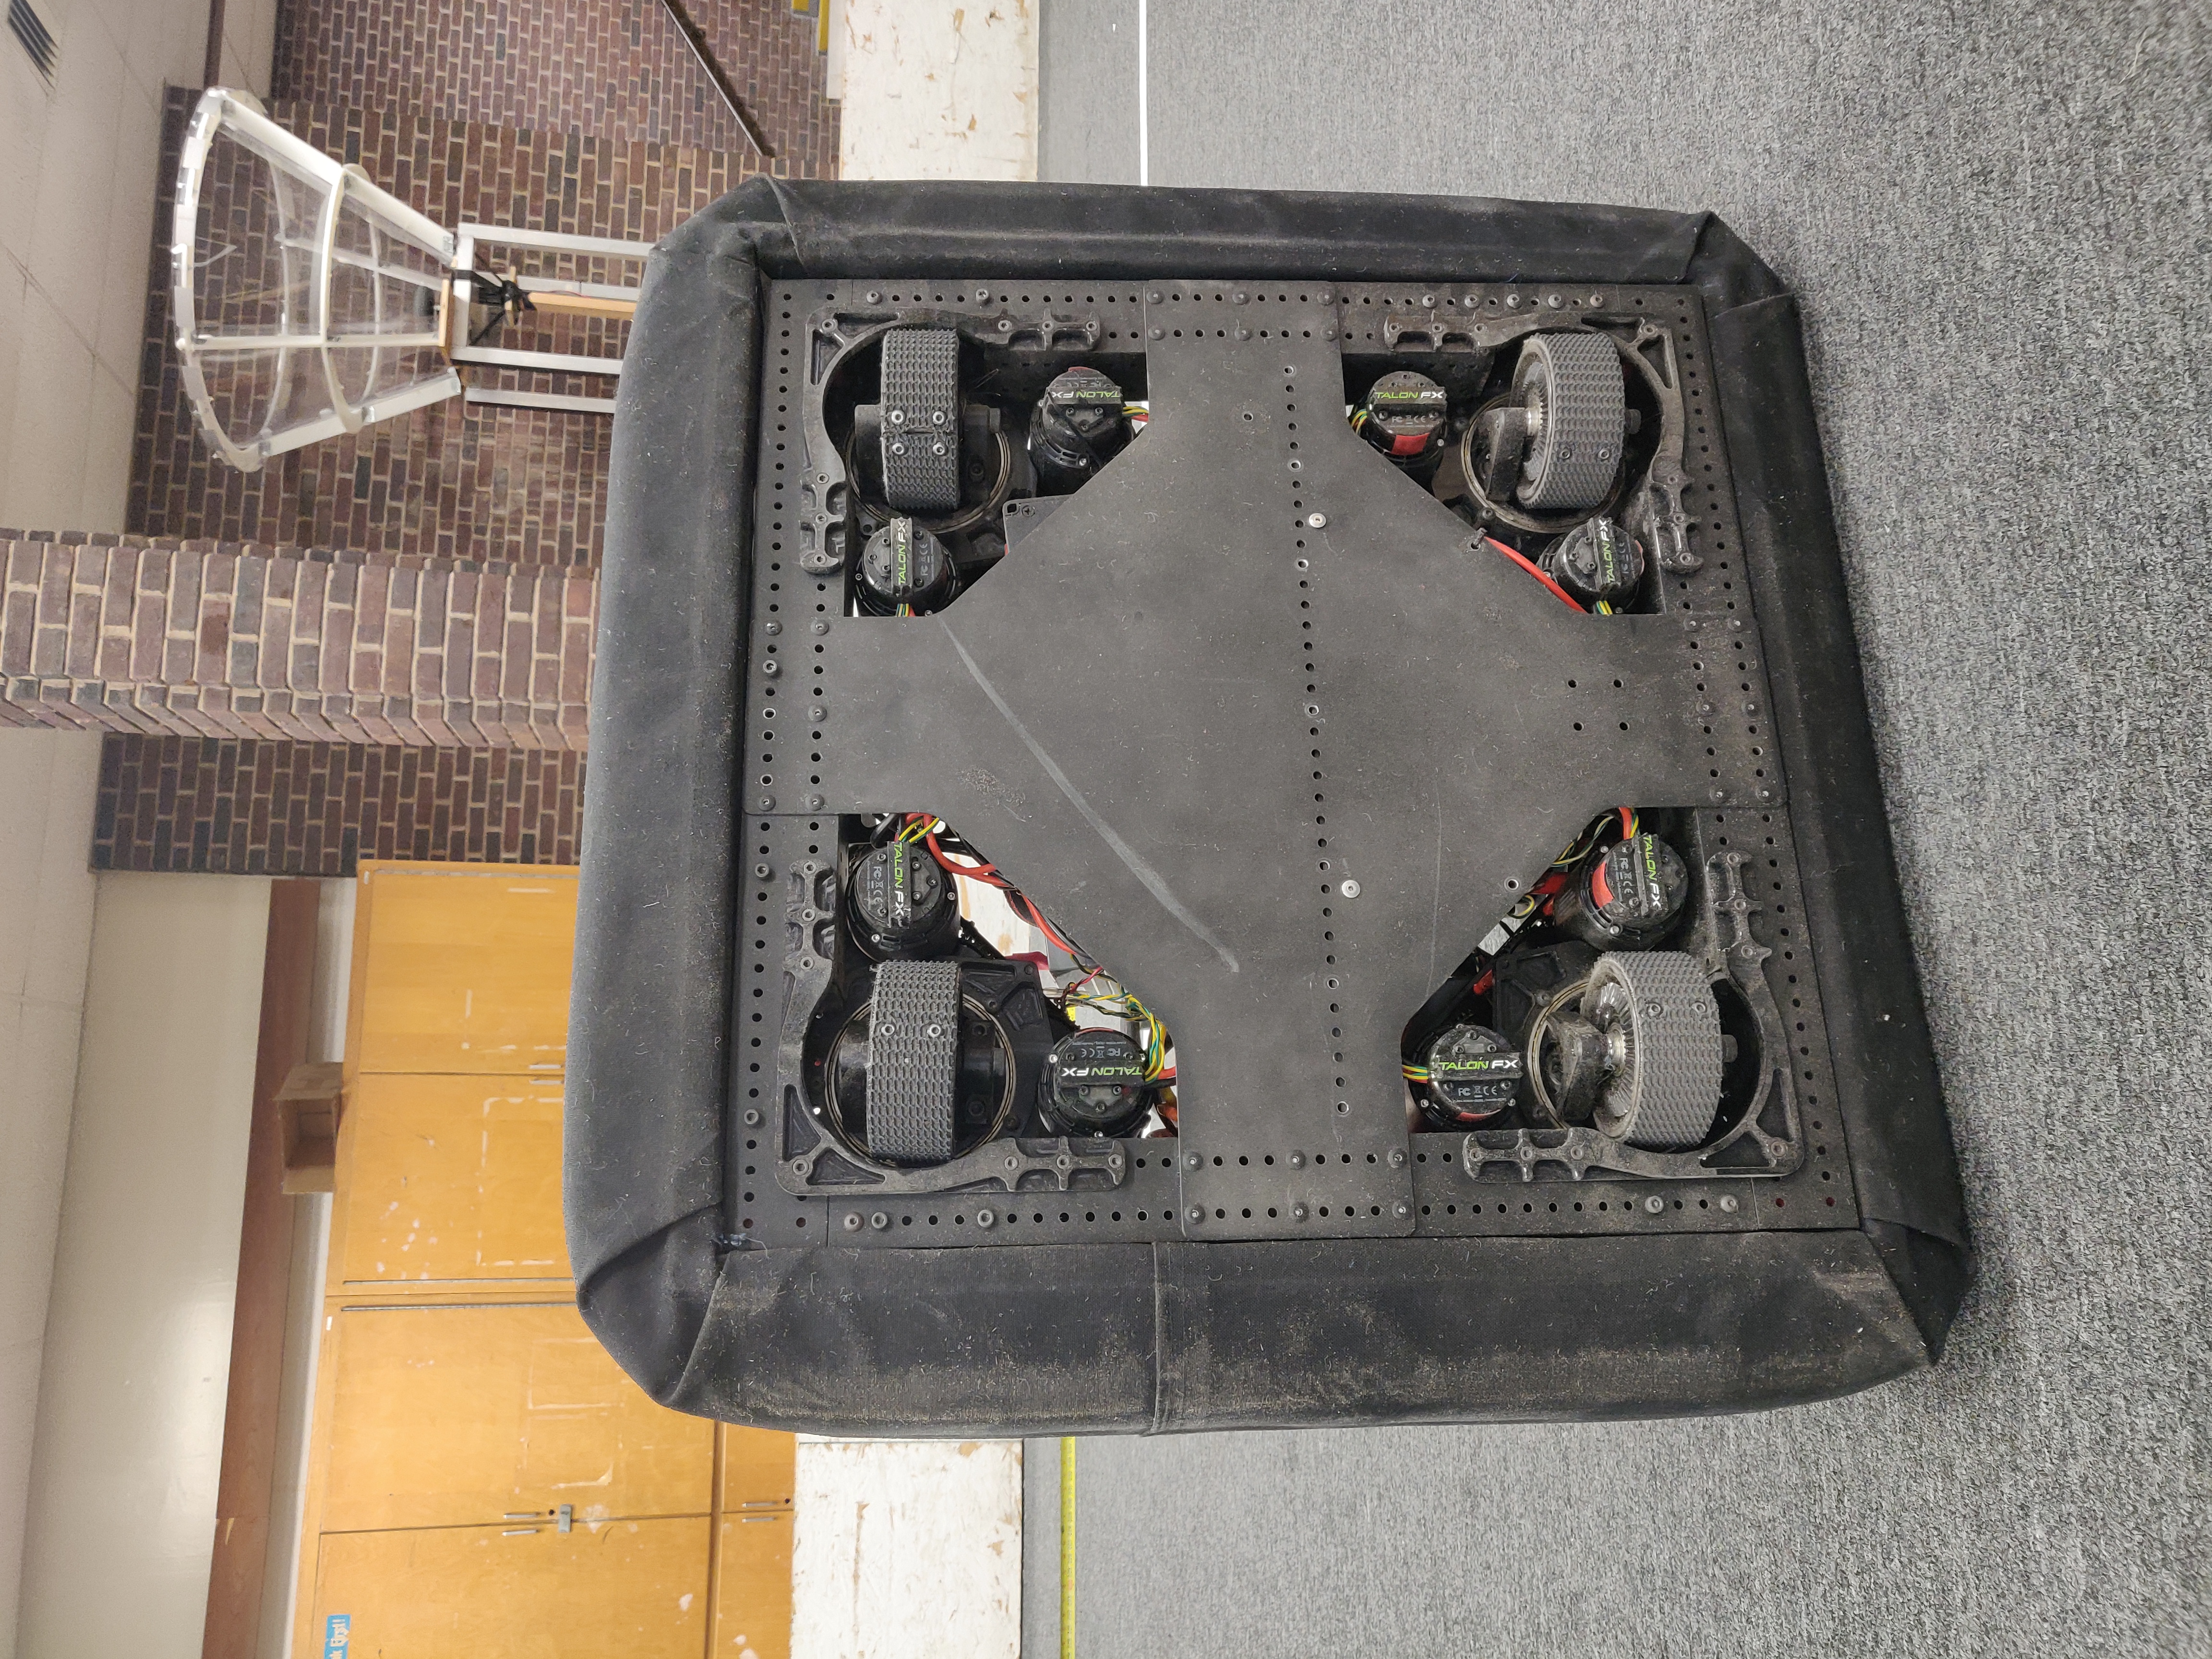
Here's an image of the underside of our robot:
1. Enable manual control of each swerve module
In your robot code, as we did in testPeriodic(), create a way to run each swerve module independently so that you can confirm each module is functioning properly.
- Ensure that a positive demand to the azimuth/angle results in an increasing encoder value and counter-clockwise rotation of the module (when you're looking down through the robot towards the carpet).
2. Pick a "home" for each of your modules
Pick a "Front" of the robot. It doesn't matter what you pick, but it needs to be consistent.
Rotate all of your modules so that they are in-line with the robot (see above image of our robot). What we did was take a 1x1 aluminum box extrusion and place it up against the wheels while the robot is on blocks. You need to be precise during this step, as otherwise the robot will drift while driving straight (you can see in the image that the top left wheel is slightly out of line)
Record the encoder values in the Constants file - when you start up your robot code again, all of the angles should now be 0, since all of the modules are facing straight ahead.
Now that the modules are all straight ahead, ensure that when sending positive demands to the drive/throttle motors, they would be propelling the robot forward if the robot was on the ground.
3. Implement angle PID
In your robot code, modify test mode so that you can demand angle values for each module. Tune the values to get the desired response.
4. Implement full robot-centric driving
Using the code in our teleopPeriodic() method, you should be able to now control all of the modules by using the gamepad. Test your code first while the robot is still on blocks - when strafing all of the modules should be in-line and all of the wheels should be moving in the same direction. Once this is working properly, you should be able to put the robot on the ground and test driving it out.